
So, you’re a Melbourne-based small business owner with a fantastic product or service, and you’re ready to conquer the online world? Excellent choice! E-commerce is booming, and for many aspiring entrepreneurs in Melbourne and across Australia, Shopify is the go-to platform to build a professional, powerful, and scalable online store. This guide will walk you through the essential steps to get your Shopify setup Melbourne off the ground, turning your entrepreneurial dream into a reality.
Setting up an online store might seem daunting, but Shopify is designed to be user-friendly, even for those who aren’t tech-savvy. Let’s dive into how you can launch your Melbourne business online.
Step 1: Sign Up for Shopify & Start Your Free Trial
The very first step is to head over to Shopify and start your journey. Shopify often offers a free trial, giving you a risk-free opportunity to explore its features before committing. For Melbourne businesses looking to get started, this is a perfect way to test the waters.
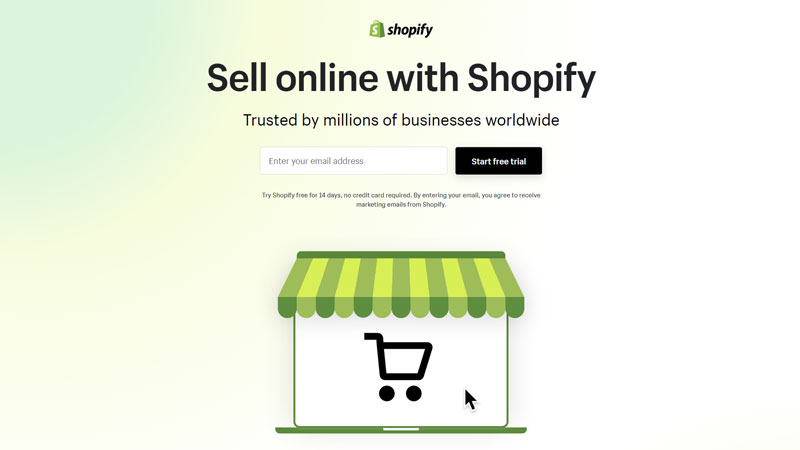
Image: The initial Shopify sign-up page where you can start your free trial.
During the sign-up process, you’ll be asked a few questions about your business, such as your store name and what you plan to sell. Don’t worry if you don’t have all the answers finalised; you can always update these details later. If you’re ready to take the plunge and want to support our content, you can start your Shopify journey through this link.
Step 2: Familiarise Yourself with the Shopify Dashboard
Once you’ve signed up, you’ll gain access to your Shopify admin dashboard. This is your command centre where you’ll manage everything from products and orders to customers and marketing. Take some time to click around and get a feel for the layout. Key sections include:
- Home: An overview of your store’s activity, sales, and pending tasks.
- Orders: Where you’ll manage and fulfil customer orders.
- Products: Add, edit, and organise your products or services here.
- Customers: Keep track of your customer information.
- Analytics: Gain insights into your store’s performance.
- Marketing: Tools and integrations to promote your Melbourne business.
- Discounts: Create and manage discount codes.
- Online Store: Customise your website’s theme, blog posts, pages, and navigation.
- Settings: Configure payments, shipping, taxes, and other crucial store settings.
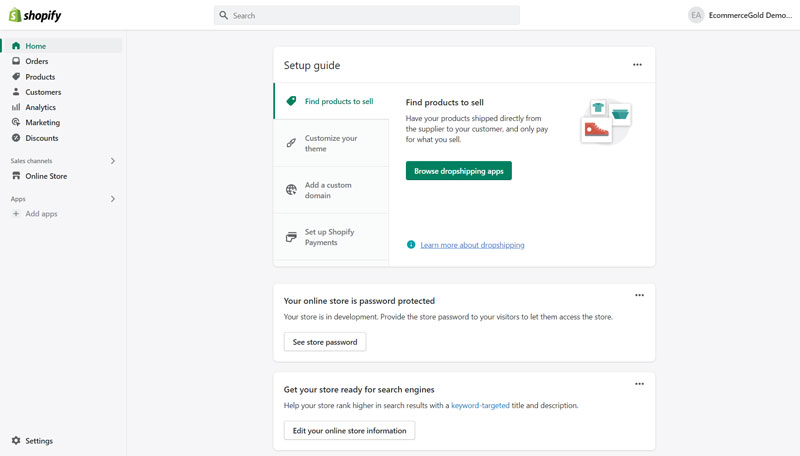
Image: A typical Shopify admin dashboard, showing the main navigation and setup guide.
This Melbourne e-commerce guide for Shopify emphasises getting comfortable with this dashboard – it’s where the magic happens!
Step 3: Essential Store Settings Configuration
Before you start adding products, it’s crucial to configure your store’s basic settings. Navigate to ‘Settings’ at the bottom left of your Shopify admin dashboard.

Image: The Shopify settings menu, highlighting key areas like Store details, Plan, Billing, and Payments.
Key areas to focus on initially for your Small business Shopify Australia setup include:
- Store Details: Update your store name, business address (important for Melbourne local businesses), contact information, and store currency (AUD for Australian stores).
- Payments: Set up how you’ll accept payments. Shopify Payments is the easiest to configure, but you can also integrate third-party payment gateways.
- Shipping and Delivery: Define your shipping zones (e.g., Melbourne metro, Victoria, Australia-wide, international), rates, and methods. Consider local pickup options if you have a physical presence in Melbourne.
- Taxes: Configure how taxes (like GST) are handled. Shopify can help automate this, but it’s always good to consult with a local Melbourne tax professional.
- Legal: Add essential legal pages like a Refund Policy, Privacy Policy, Terms of Service, and Shipping Policy. Shopify provides templates you can adapt.
Step 4: Choose a Theme and Customise Your Melbourne Storefront
Your theme determines the look and feel of your online store. Shopify offers a range of free and paid themes in its Theme Store. Choose one that reflects your brand and appeals to your Melbourne target audience. Consider themes that are mobile-responsive, fast-loading, and offer the features you need.
Once you’ve selected a theme, you can customise it using Shopify’s intuitive drag-and-drop editor. You can change colours, fonts, add your logo, create a compelling homepage, and set up your navigation menu. Think about what makes Melbourne unique and see if you can subtly incorporate local flavour if it fits your brand.
Step 5: Add Your Products
Now for the exciting part – adding your products! Go to ‘Products’ in your Shopify admin and click ‘Add product’. For each product, you’ll need to add:
- Title: A clear and descriptive name.
- Description: Detailed information about the product, its benefits, and features. Use persuasive language that speaks to Melbourne shoppers.
- Images/Videos: High-quality visuals are crucial. Show your products from multiple angles.
- Pricing: Set your price and compare-at price (if applicable).
- Inventory: Track stock levels.
- Shipping: Specify product weight and any customs information if shipping internationally.
- Variants: If your product comes in different sizes, colours, or materials, add them as variants.
- Organisation: Categorise your products using product types and collections to make them easy for customers to find.
Step 6: Set Up Your Domain Name
Your domain name is your store’s web address (e.g., www.yourmelbournebusiness.com.au). You can buy a new domain through Shopify or connect an existing one you own. A custom domain looks professional and helps build your brand identity. For businesses targeting the local market, a `.com.au` domain is often preferred for a Small business Shopify Australia presence.
Step 7: Test Everything and Launch Your Melbourne Shopify Store!
Before you announce your grand opening to all of Melbourne, thoroughly test your store. Place a test order to check the checkout process, payment gateway, shipping calculations, and email notifications. Browse your store on different devices (desktop, mobile, tablet) to ensure it looks and works great everywhere.
Once you’re confident everything is running smoothly, it’s time to launch! Remove the password page from your online store (if it was active) and start promoting your new Melbourne-based Shopify store.
Setting up your Shopify store is just the beginning. Continuous effort in marketing, customer service, and keeping your store updated will be key to your success in the vibrant Melbourne market and beyond. Good luck!
Ready to start building your dream online store in Melbourne? Click here to begin your Shopify journey today!
Keywords: Shopify setup Melbourne, Melbourne e-commerce guide, Small business Shopify Australia


